BART Platform Sign Portable
An authentic, desktop BART experience.
BART Platform Sign Portable in action, train arriving.
I like commuting by BART. It’s fast, (relatively) reliable and (mostly) stress-free. Indeed, for the price, there isn’t really a whole lot to complain about. That said, if there has to be one, for me it’s probably going to be about the long wait between trains for some lines. Adding more trains is an obvious solution to the problem, albeit a rather expensive one. Timing the train is another, a much more feasible one at that. In fact, thanks to the BART app or even Google Maps, arrival and schedule info is readily available to inform trip planning. However, sometimes I just wish that there were a BART platform sign right outside my bedroom window. Yes, that would be so cool. Well, so unrealistic, too. Fortunately, the next best thing is very much doable with a little help from a Raspberry Pi Pico W.
BART Platform Sign, the Original
Behold the original, real BART platform sign, a piece of display that looks all too familiar to some 145,700 riders (as of Q3 2022) everyday -
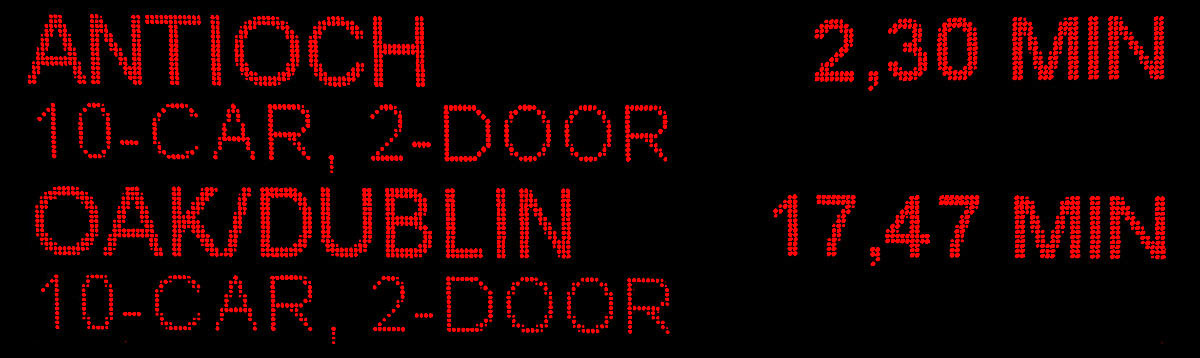
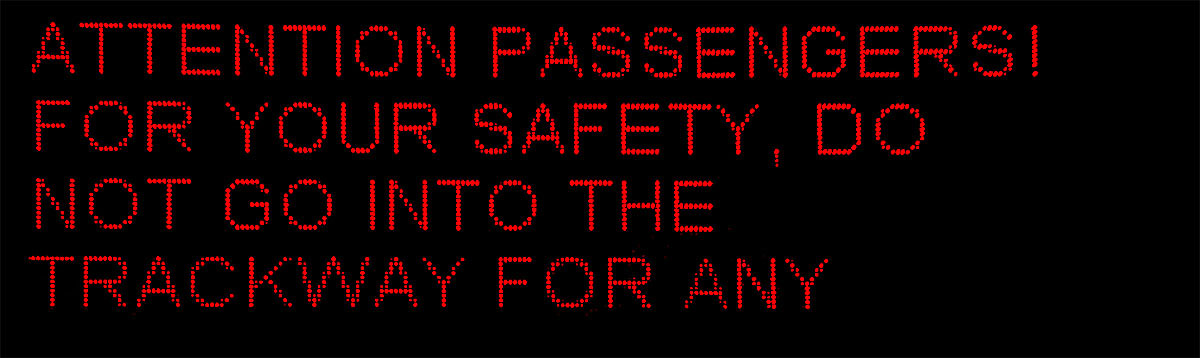
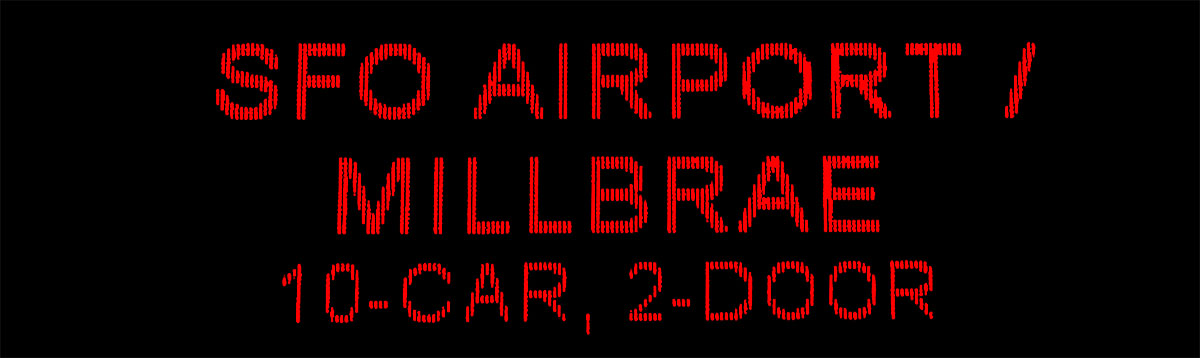
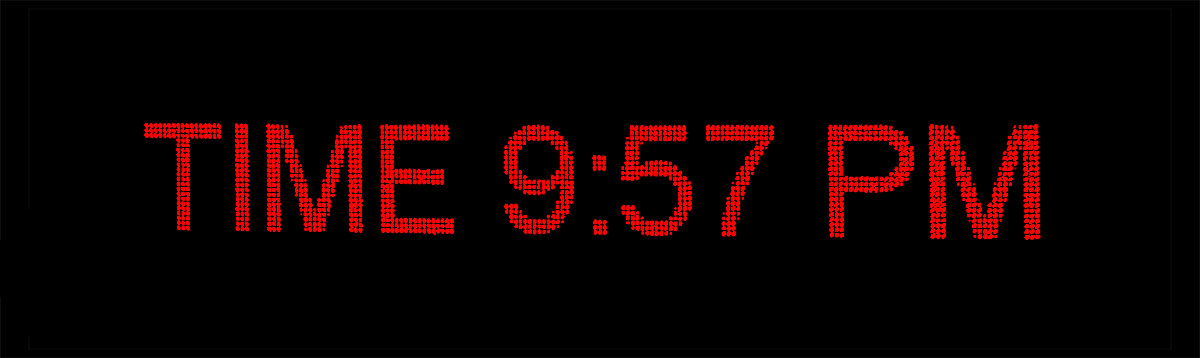
Four types of platform sign layouts. Top left: estimated wait time; top right: BART Service Advisories; bottom left: train arriving; bottom right: digital clock.
If you stare at it for a while, a pattern begins to emerge. Generally, the sign loops through four different layouts. First, there’s the estimated wait time screen between trains, which can span multiple screens by itself. This is often followed by a second type of layout, BART Service Advisories, usually regarding an announcement of a train outage, cancellation, or just a friendly reminder from the police asking you to pay attention to your belongings. Third, a full-screen display of the destination kicks in when a train enters the platform. Finally, a digital clock pops up from time to time. They are all useful in some way, with the possible exception of the second one which isn’t that informative in my opinion.
Connecting a Display
There are many affordable options when it comes to adding a display to a Raspberry Pi. For example, this 0.96-inch one can be had for about $3 apiece. It features an 128x64 OLED display and should provide enough screen real estate for all the important stuff to be rendered on a single screen. For a detail instruction on how to use the display, here is an excellent guide from Tom’s Hardware.
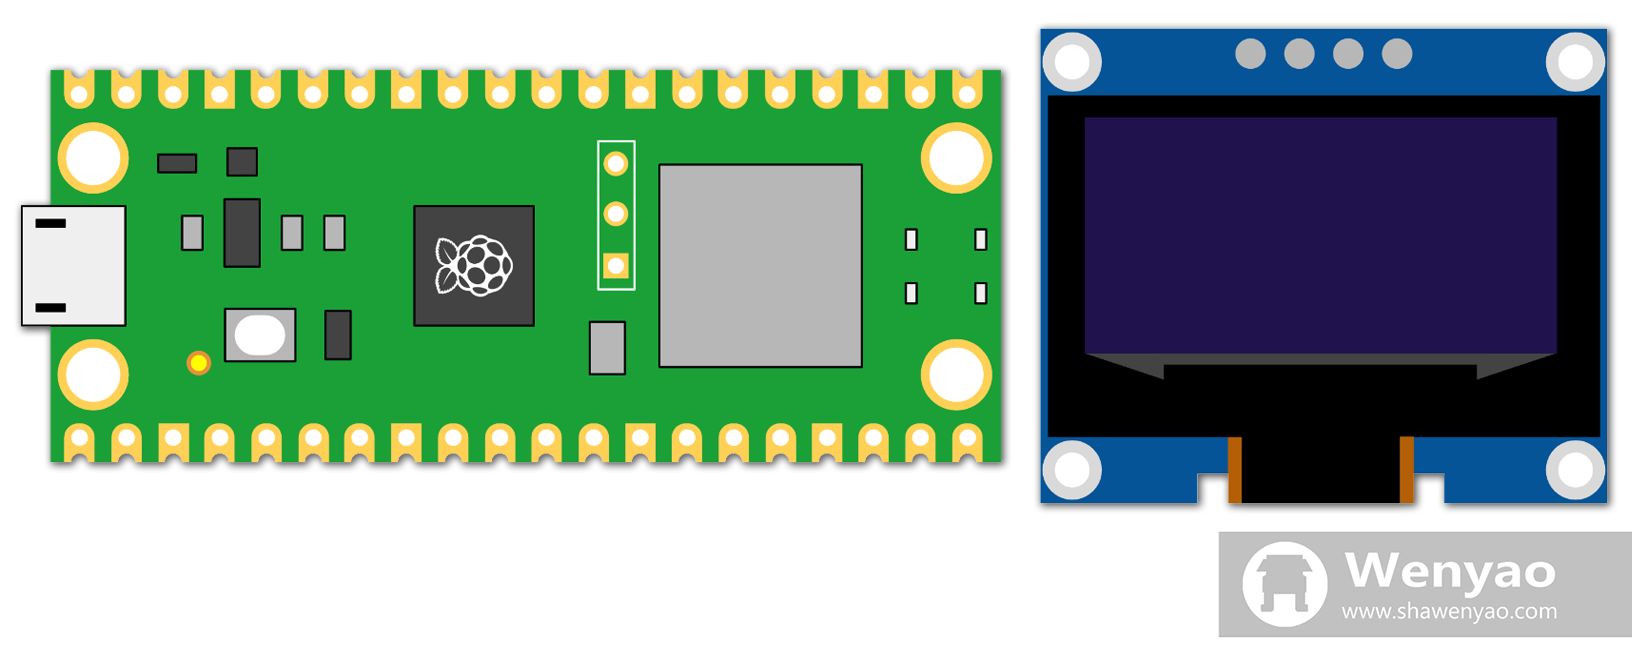
Raspberry Pi Pico W and OLED display. Left: Raspberry Pi Pico W; right: 128x64 OLED display. Image created by author on Google Slides.
Getting Real-Time Departure Estimates
BART offers real-time departure estimates via its API. A simple HTTPS request to:
https://api.bart.gov/api/etd.aspx?cmd=etd&orig={station}&dir={direction}&key={key}&json=y
will result in a list of incoming trains for a given station in a given direction being returned. This would have been a breeze if not for one caveat. For some reason, the official urequests library that comes with the MicroPython firmware has HTTP/1.0 hardcoded. Cloudflare, by which the domain bart.gov is protected, doesn’t like it very much and will instantly shut down any connection attempt as such. This calls for a modification in the request() function in urequests. Thankfully, after playing with the script, I realize that the fix could be something as simple as changing line 94 from:
s.write(b"%s /%s HTTP/1.0\r\n" % (method, path))
to:
s.write(b"%s /%s HTTP/1.1\r\n" % (method, path))
in addition to a few touches at the end to parse the JSON response correctly.
Controlling Text Sizes
Without an operating system, changing text fonts or sizes isn’t as straightforward. To solve the problem, Peter Hinch has developed a wonderful solution, which to my understanding involves some sort of character-by-character bitmap of the font that are cleverly encoded in a bytearray form. Once the Writer class is initialized with such bytearray:
# various fonts
font6_writer = writer.Writer(oled, font6, verbose=False)
font10_writer = writer.Writer(oled, font10, verbose=False)
courier20_writer = writer.Writer(oled, courier20, verbose=False)
it can then be used to print any arbitrary text to the OLED screen:
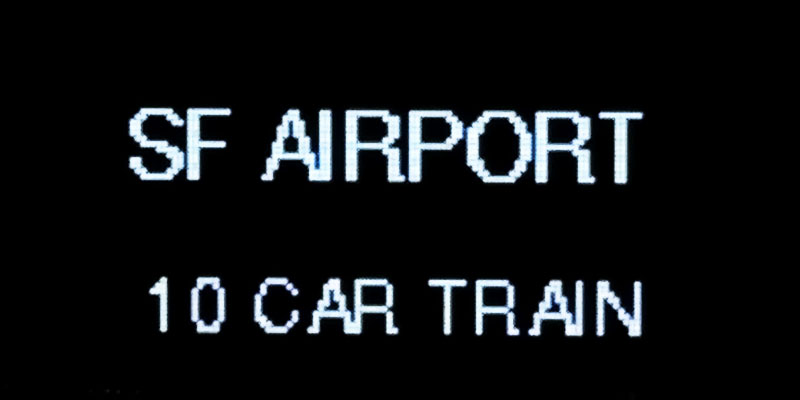
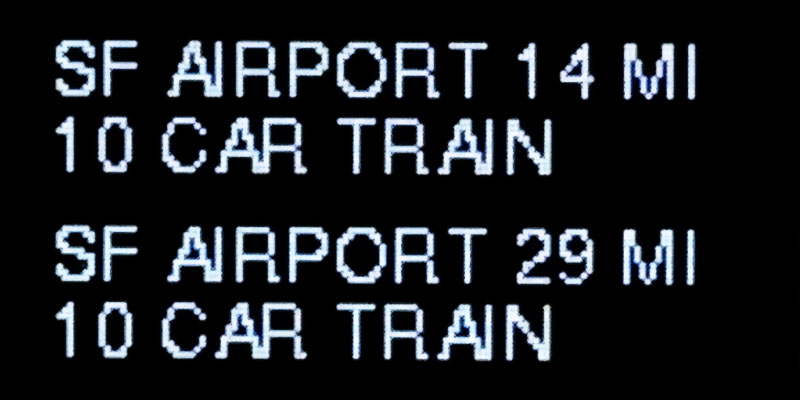
An OLED screen displaying texts in different font sizes. Left: train arriving; right: estimated wait time.
Displaying Time
A Raspberry Pi Pico W doesn’t have an internal battery to keep the clock running constantly, so we will need an authority to tell time upon boot up. This requires a call to worldtimeapi.org, where it will automatically deal with time zone conversion depending on the user’s IP:
https://worldtimeapi.org/api/ip
or fix the time zone with something like:
https://worldtimeapi.org/api/timezone/America/Los_Angeles
The response contains a JSON with all the information necessary to set the initial value of the onboard real time clock on a Raspberry Pi Pico W.
# set initial time based on worldtimeapi.org
rtc = machine.RTC()
rtc.datetime((year, month, day, weekday, hours, minutes, seconds, subseconds))
After initialization, rtc.datetime() will return the current date and time.
An OLED screen displaying a digital clock.
Putting It All Together
BART Platform Sign Portable in action, train arriving.
Appendix
Try It Yourself
https://github.com/shawenyao/bart-oled
Update October 12, 2023: As of September 2023, legacy BART trains (the ones with 2 doors per car instead of 3) are no longer in service. As a result, where it used to say “2-door” or “3-door” on the platform sign now displays the color of the line.